905-715-2447 Winter Hours: By Appointment Only 3301 Sideroad 10, Bradford, ON Canada

Koi Quarantine Procedures

Hydrosphere Water Gardens > Pond Advice & Tips > Koi Quarantine Procedures

Koi Quarantine Procedures

Safely Introduce New fish to Your Pond

Is a koi quarantine system necessary? Every so often, you will come across a koi (or goldfish) that you can’t resist and just have to buy, but how do you know that this fish isn’t carrying any harmful diseases that could spread to your other koi? Now more than ever, it is important to make sure all new fish are disease free before adding them to your pond and quarantining fish is the best way to prevent outbreaks from occurring in your pond.

koi quarantine tank

Why Quarantine Koi?

There are many reasons to quarantine new fish, not only do you want to protect your existing koi collection from any possible disease or parasite that the new fish may carry, but you also need to make sure they are in good shape before introducing them to your pond. Here is a basic guideline for properly quarantining your new fish before adding them to your pond. Most imported koi will have been very stressed during their journey from fish farm or breeder to your pond. In most cases, they will have been caught and moved from ponds to holding tubs, sorted then packed (crowded) in boxes, put on 1 or more flights for up to 36 hours, transported some more and then finally released into the retailers tanks – all without being fed. After all this stress, the fish are very susceptible to bacteria and parasite infestations. A good retailer will allow the fish time to recover from all the stress endured on their journey before selling them, however, many just want to sell them as quickly as possible before any problems occur. Plus once you have a quarantine tank set-up, you can always use it as a hospital tank or even to raise baby fish.

What Type of Tank To Use To Quarantine Koi?

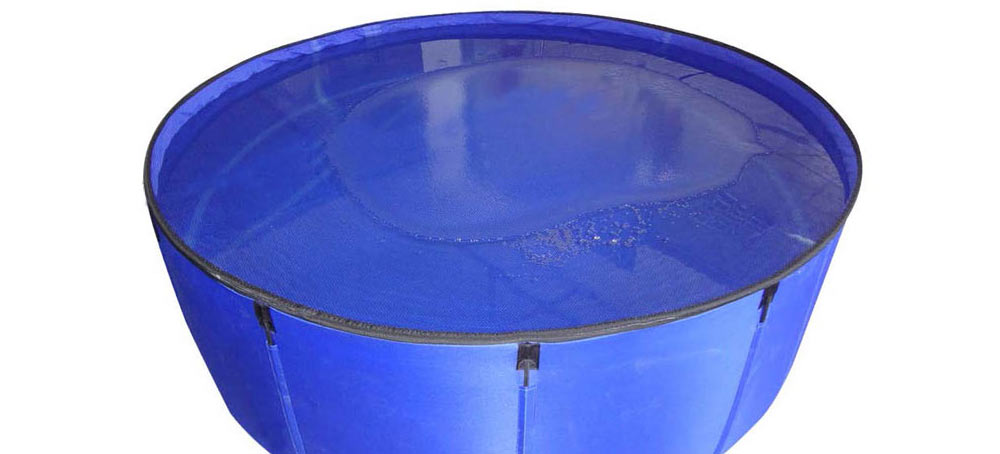
Koi quarantine tubs don’t have to be elaborate, but they do need to be reliable. You can many different types of tubs or tanks – large aquariums, livestock water troughs, 45 gallon plastic drums and ‘kiddy’ pools will all work as long as they haven’t been used to carry and harsh chemicals that could leach back into the water during quarantine. We do have large Portable Quarantine / Show Tubs for sale that can accommodate many koi at once and also fold up into a small box so that they can be stored easily when not in use. As well, filters don’t need to be very complex either, but they do need to be appropriately sized for the tank and number of fish. A large sponge filter or submersible filter like Aquascapes’ Submersible Filter will work well. For larger tanks, pressurized filters are ideal. The most important thing to remember is that the filter must be ‘cycled’ (see below).

Koi Quarantine Tank Set-Up

A koi quarantine tank should provide the following elements to ensure a successful quarantine period:

  1. Plenty of Room
  2. A net or cover
  3. A cycled biological filter to provide optimum water quality
  4. Salt (possibly other medications)
  5. Heat (if needed)


  1. Give the fish room to swim comfortably so they can relax and settle in to their new environment, this allows their immune systems to start to functioning properly again. A minimum 50 gallon quarantine tank is necessary if you are buying 2 or 3 smaller fish – 6 to 8”, larger if you regularly buy bigger fish or more than a few at a time. Bigger is always better – water quality, temperature, ammonia etc can change quickly in a small volume and is more difficult to manage.
  2. It is very important to keep the quarantine tank netted. New arrivals are often
    very frightened and disoriented, and for some reason their first reaction is to jump. Nothing is more frustrating than seeing a new fish lying dry on the floor. It also helps to provide some sort of ‘cover’ for the fish to hide under. This helps the fish to feel protected and will help reduce the likelihood of jumping. Artificial floating water lilies or pads or even a few small pieces of styrofoam will do the trick.
  3.  Optimal water quality is also a must. You can put a perfectly healthy fish into water with elevated ammonia or nitrite and it will become stressed and most likely sick in a short time. A quarantine tank with poor water quality is worse for the new fish than putting them directly into the pond. The keys to providing good water quality is having good circulation and a large established biological filter. It often takes 4-6 weeks for a biological filter to become ‘cycled’ and function efficiently, so great way to avoid this ‘new tank syndrome’ is to have the tank set up early with a few healthy fish to cycle the tank naturally ahead of time. Remember to test your water quality daily with a test kit, especially for the first 2 weeks. Adding beneficial bacteria will speed up the cycling process and reduce stress on fish.
  4. Salt is often referred to as chicken soup for koi and goldfish, it reduces stress, helps fight nitrite toxicity, kills many common parasites and more. Use a non-iodized salt at a rate of 3 teaspoons/gallon or 2.5-3Lbs / 100 gallons to reach a concentration 0f 0.3%. If you are bringing in Japanese koi, you may want to go as high as 0.5%.
  5. The water temperature should ideally be kept around 72- 74°F. Depending where and when you are quarantining your fish you may need a heater such as an aquarium heater to achieve this.

Koi Quarantine Procedure

  • DAY 1 – Float the fish in the bag to allow the temperatures to gradually acclimate (usually 15-20 minutes). Gently introduce the fish into the quarantine tank – do not allow any water from the bag into the quarantine tub. Let the fish settle in the remainder of the day and overnight
  • DAY 2 – Newly imported fish may look stressed, sit on bottom somewhat inactive – this is normal so long as water quality is OK. On the other hand, fish that have had a rest period at the dealer will likely be active and look good. Try feeding them a high quality fish food and see if they take it. After a few days, you might want to consider feeding them with a good medicated antibiotic food as a preventative measure, if you do, make sure to feed only that food for 14 days.
  • DAY 3 – Continue feeding, monitoring water quality and watch the fish closely for any signs of disease or parasites, and treat accordingly. Remember, many antibacterial treatments will also kill the beneficial bacteria in your biological filter resulting in the water quality deteriorating. Do partial water changes as needed, usually 10-25% at a time. Continue this for 2 full weeks.
  • WEEK 3 – If all goes well, you might be ready to put these fish into your pond, but wait a bit longer. Every pond and ecosystem has its own set of ‘bugs’ ie. good and bad bacteria and parasites. All fish co-exist with these bugs in their environment since no pond is ever completely free of bacteria or parasites. Obviously, fish imported from Japan will be used to a completely different environment than your pond’s unique environment. One way to help them gradually acclimate to this is to introduce 1 or 2 ‘test’ fish from your pond into the quarantine tank with the new fish. Introduce a fish that maybe hasn’t developed the way you had hoped, or at least one that you don’t mind losing if a problem develops. This fish will gradually introduce your pond’s unique signature in to the quarantine tub. Plus, this is a good way to check to see if the new fish are carrying any ‘bugs’ that might cause a problem with your fish collection.

End Of Quarantine

If after 3 full weeks, all fish look good you can get ready to introduce them into the pond. Make sure the quarantine water and pond water temperatures are with in a couple degrees of each other. Then carefully transfer the fish into a plastic bag or other container, place it in the pond and let the fish venture out into the pond at their own pace.

KHV, Koi  & Quarantining

If you have any concerns about your koi dealer and are concerned about the KHV, then consider raising the temperature of your water to 76°F – 78°F from the very beginning. Since KHV is temperature triggered (at about 75°F), a koi exposed to this temperature for more than 2 weeks will most likely start to show signs of the disease (excess slime, decaying gills) and quickly die. This is not a foolproof method, as some infected fish may just be carriers of the disease without showing symptoms, but it is the best method available so far. The most reliable way is to buy from a reputable dealer

Summary

  1. A large tub or tank, 50 to 300 gallons.
  2. Fully cycled biological filter
  3. Temperature should be 72 – 78 °F
  4. Check water quality regularly.
  5. Dose the quarantine with 0.3% salt (non-iodized salt at 3 teaspoons per gallon).
  6. Net to cover tank to prevent jumpers
  7. Duration -21 days minimum

Some people prefer to take a proactive approach towards new koi and possible diseases or parasites. That is, they treat the koi before they show any symptoms. If you have bought imported koi, especially Japanese koi and you they have not been quarantined by your dealer, it is a good idea to do some preventative treatments. Here is a list of the most common, effective treatments that won’t affect the biological filter and compromise water quality.